In my second article about using colour pencil I am focusing on pressure. Understanding the pressure you apply when laying down pencil is one of the most important aspects of working with this medium. Here I will explain how to assess and adjust the pressure you use to help you achieve better results.
Why is pressure so important?
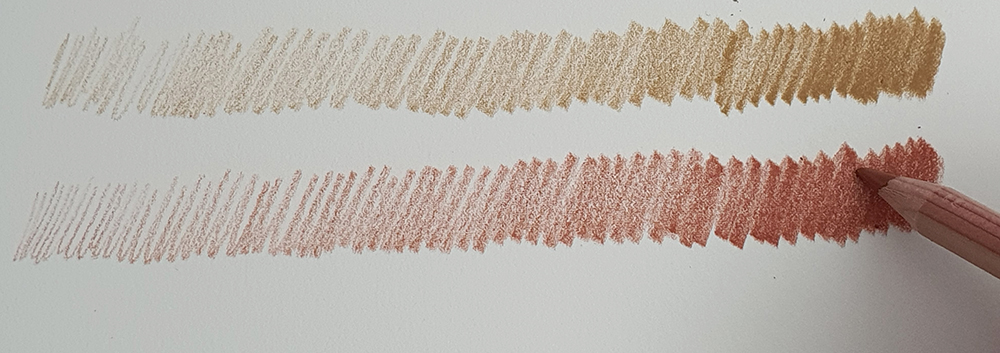
When starting out with colour pencils a lot of beginners often give up very early on. Often this is simply because they are so different to work with compared to other more traditional mediums. Colour pencil is seen as quite a slow medium that demands patience and perseverance. In addition they also demand a bit of a different approach to how you work. Colours are mixed and blended directly on the surface using multiple layers and glazes. Much of this is dependent not only on the amount of pressure that you use to apply the pigment, but also the type of support or surface that you are applying them to. Also, as we have already seen in this article, the type of pencil that you choose also makes a huge difference.
Finding out your pressure is an absolute must when starting out. From my own experience of many years of in person teaching I have often witnessed someone who thought they were quite light handed actually turned out to have a very heavy pressure and vice versa. Understanding the pressure used or needed when working with colour pencil is a simple thing to find out by following a basic pressure test.
How to do a pressure test
A pressure test is where we take our pencils from a whisper to a scream on our chosen support. Colour pencils are a very tactile medium. It is not just about the effect that you can see with your eyes but also the feel and touch of the pencil going down. To create your own pressure test you need to take a handful of pencils. I suggest a couple of lights, a couple of mid-tones and a couple of darks.
Whisper to Scream
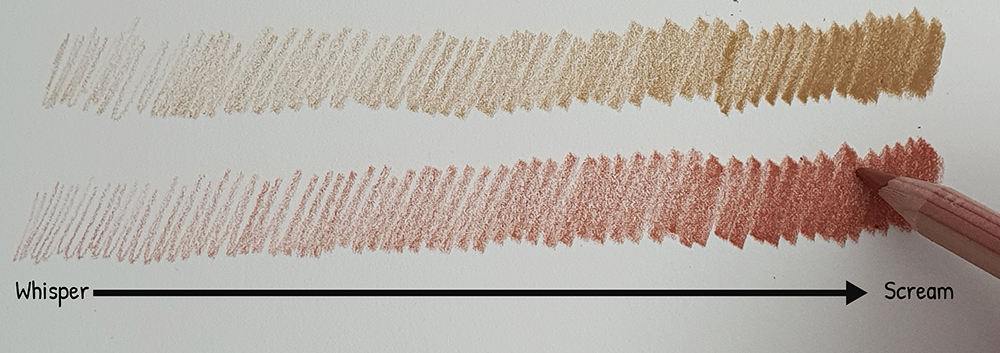
Working from one side to the other use a vertical back and forth stroke. At the starting point use the lightest possible touch to the paper. Gradually build the pressure as you work across to the other side until you are pressing as hard as possible. This is taking it from the whisper to the scream.
Make a scale
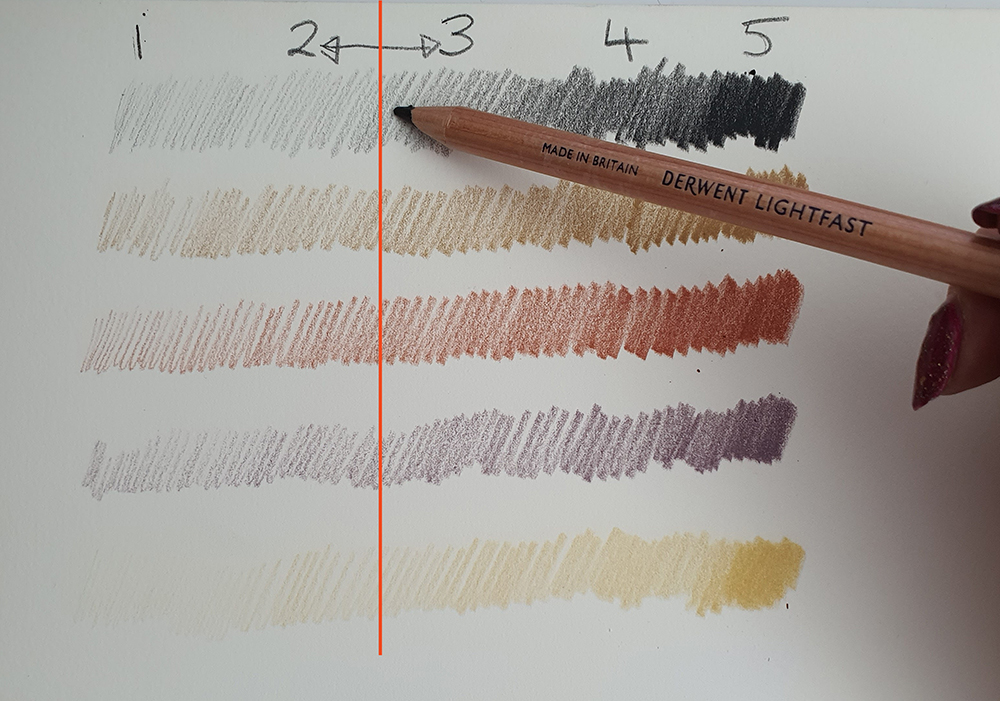
You never want to apply the heaviest pressure in one single layer. This is because it will crush the tooth of your support. That means that you can’t lay down any of the layers or glazes needed to achieve realistic blends or tones. A standard pressure is a light to medium pressure on the scale. Number the scale from 1-5, you want to be working around pressure 2-3 for most of your layers.
Assess your pressure
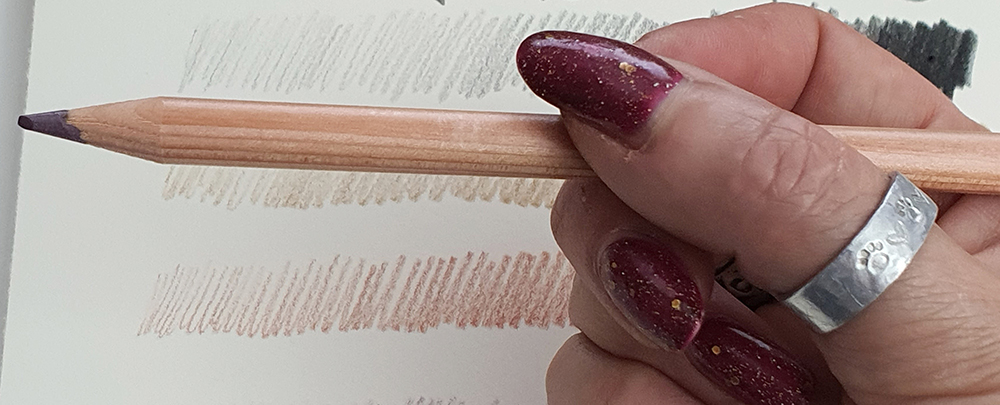
If your lightest pressure is looking more like a 4 to 5 on the pressure scale try changing your grip on your pencil. By holding the pencil about halfway up the shaft it prevents you from using too much pressure. It will instantly allow you to be more light handed with your approach.
Practice makes perfect
It is important that you practice this as much as you can. Preferably before starting any new project and especially if working on a different support or using different pencils. Over time, as your experience builds and you get to know your pencils and your supports better then you will be able to vary your pressures more within your work. But, when starting out it will help you to develop faster if you try to use a light hand as much as possible.
Watch the video
You might be interested in my first article about the differences in my most used Derwent pencils. Watch out for my third blog post about using different pencil strokes.
Lisa Ann Watkins BA(Hons), AFC, CPCAM, UKCPS is well known in the world of coloured pencils as a multi award winning artist & tutor.
In July 2017 Lisa set up her first formal teaching channel on Patreon. Lisa creates in depth videos & written tutorials for her online students every month & now teaches over 300 people around the world. She has also just released her first book with Search Press. Lisa is a member of the prestigious tutoring teams of renowned art educators such as the SAA & Patchings Art Centre. She works closely with Clairefontaine and Grafix and is an official Brand Ambassador for Derwent Art.
You can keep in touch with Lisa on her website Animal Art by LAW and on her instagram or facebook pages.
